
What you'll need:
- A box of large paperclips
- Electrical tape (you can get a 5 pack of colours for around 3$ most places)
- Jump Rings
- Scissors
- A Clasp (or two)
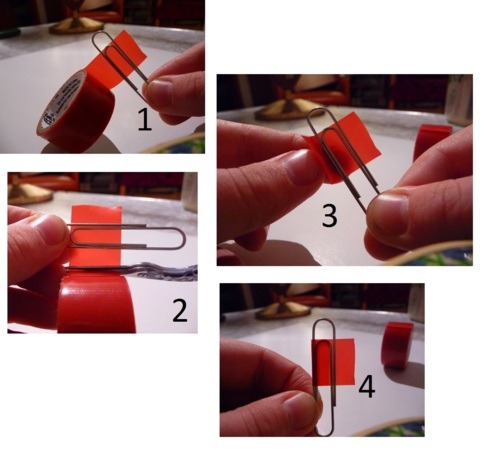
1-Unroll your electrical tape by about an inch; place the clip in the middle so you have about the width of the paper clip in space left above. Notice that I am beginning with the side of clip with the second 'bend' in it--you'll want to be consistent with which side you choose to begin.
2-Cut about the width of the paperclip from underneath too.
3- Fold over one side and press firmly down. Usually, you'll want to pick whichever side seems shorter for your first seal/press.
4- Press the other side down and hold firmly. It goes without saying that this second side should be the longer of the two sides of excess tape.
5- "" of 4
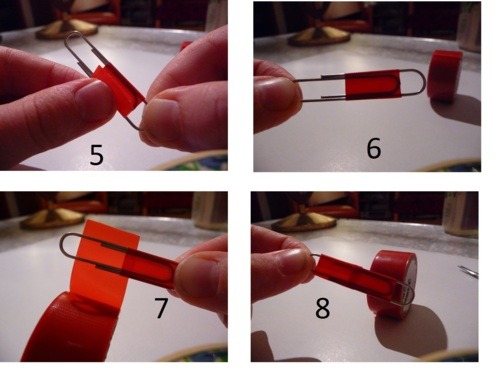
6- Behold, your first side is done.
7- Now for the second side, you'll want to overlap by about 2 mm. Repeat steps 2-4. Make sure that you are sealing on the same side as your first seal! This is very important so you have one 'perfect' side.
8- You're done! You've now created a well sealed 'bone'.
You'll have to repeat steps 1-8, 24 times for one colour (red) and then another 34 times for your other, contrasting colour (yellow).
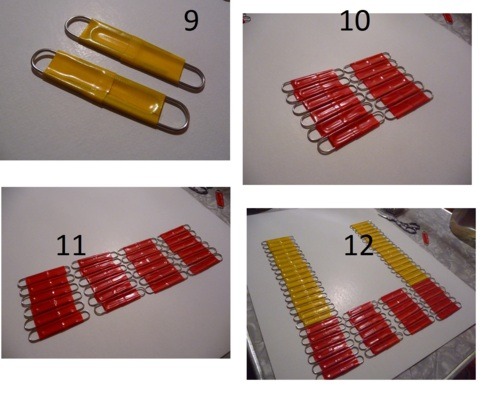
9- As you can see, pictured here, we have the 'perfect side' on top, and the imperfect back (with the seals) on the bottom. Make note of this while lying your clips down. Always making sure that your perfect side faces up.
10- You'll want to make sure you put the smaller end of the clips towards the middle (and the larger end facing out); laying our 2X6 clips. This will be standard throughout the necklace, small end will always face in, large end will always face out.
HINT: 
11- For the sides of the same colour, you'll want your smaller end of the clips again facing the middle and meeting with the large ends of your 'inner clips'. I'm going to keep repeating this because it's so important!
12- Keeping with the smaller end of the clips, lay 17 clips of your contrasting colour our on each side.
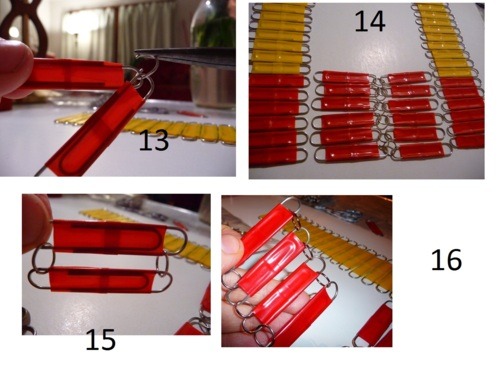
13- Going back to your middle section, start joining the smaller end of the clips ( the insides) together. Hint: when joining your clips together, press the imperfect sides together, then add the jump ring; this will ensure that both your 'perfect' sides are on the same side every time ( try saying that aloud).
14- ""
15- Now for the sides, just as before, the same hint from 13 applies, except that you'll be joining both ends of the paperclips . Again remember to keep the large ends of the clips together and small ends of the clips together.
16- You'll start creating a ladder with a perfect side and a back (with the seals visible).

17- 'Ladder' one side
18- And then the other. Now make sure your sides are laying so that the large end of the clips face out and the little ends face in. The same rule from 10 ( and every other step) ! Make sure that your perfect side is on top and your imperfect back is facing down.
19- Now you will connect the middle section's large clip ends to the small clip ends of the sides; Do not attach to the jump rings you've just used to make the 'ladders'.
20-""

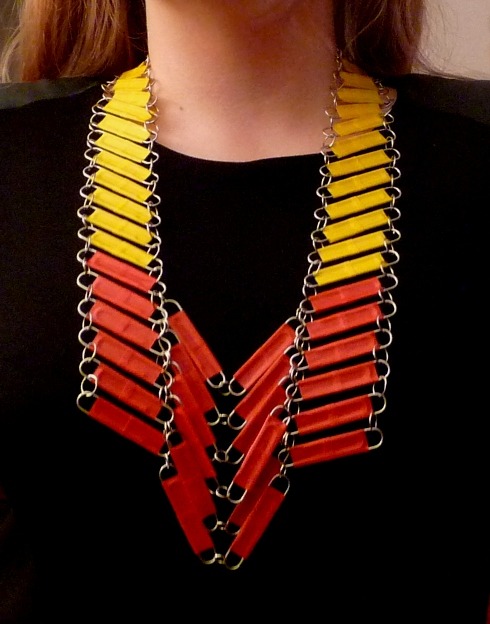
21- Attach 2 clasps to the ends and you're done.
WOW! How cool is that!
ReplyDelete